Easy No-Bake Strawberry Dream Bars: A Summer Delight
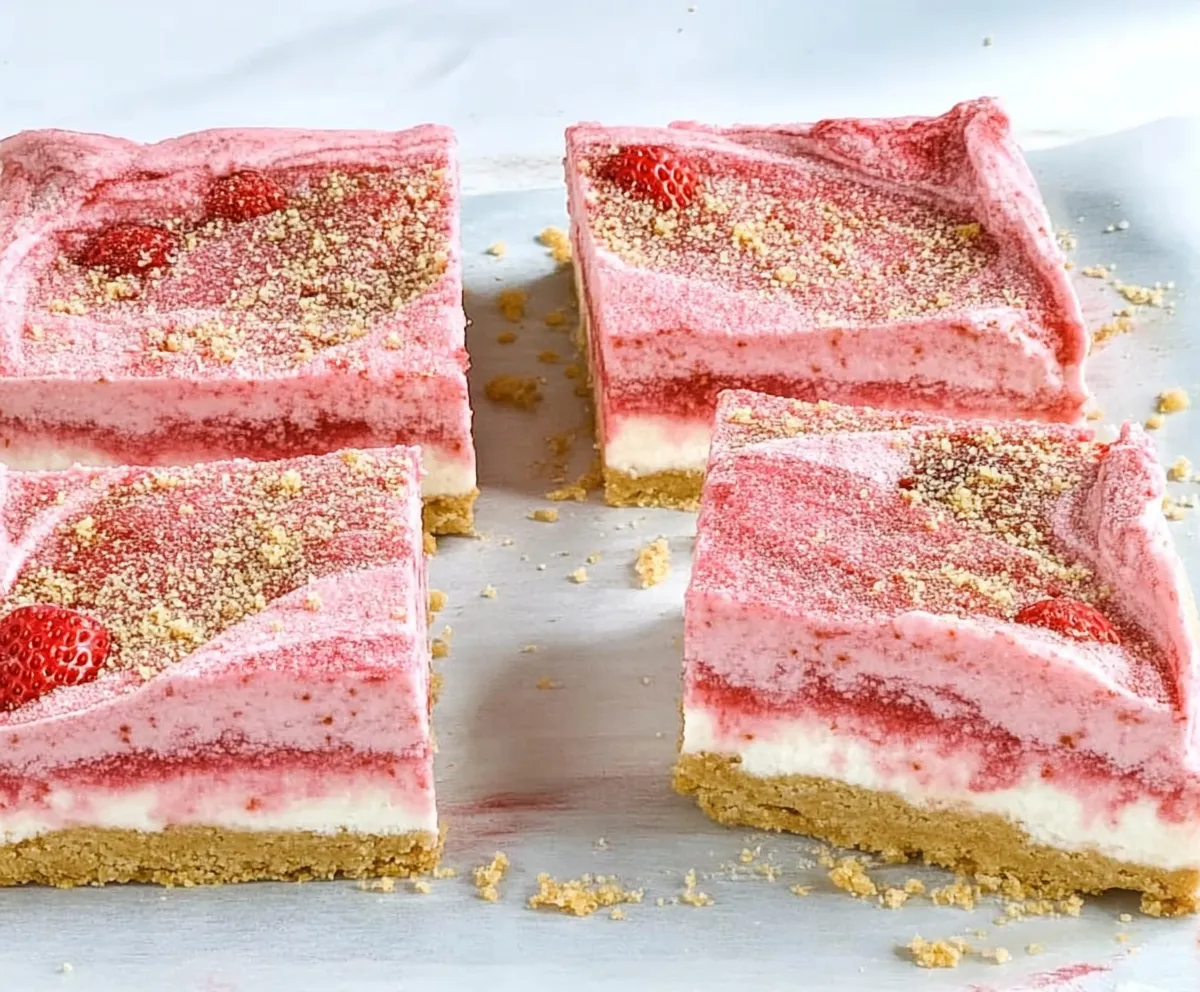
Table of Contents
Introduction
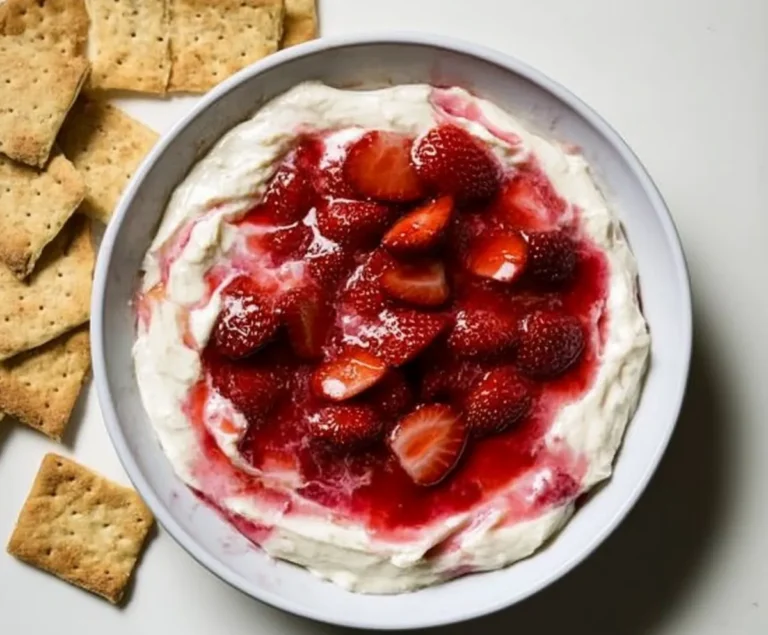
When the sun is blazing and you want dessert without turning on the oven, No-Bake Strawberry Dream Bars come to the rescue. This layered treat combines a buttery shortbread crust, a zesty lemon-cream center, and a vibrant strawberry swirl all chilled to creamy perfection.
Whether you’re hosting a Fourth of July barbecue or craving a light, fruity finish after dinner, these bars strike the perfect balance between sweet and tangy. Plus, they’re kid-friendly, pet-friendly (no raw eggs!), and fridge-ready in just a few hours. When you make No-Bake Strawberry Dream Bars for friends and family, you’ll watch them disappear faster than you can say “summer!”
Why You’ll Love No-Bake Strawberry Dream Bars
- Effortless Assembly: No oven? No problem. You simply blend, layer, and chill ideal for hot days or busy schedules.
- Layered Textures: A crisp shortbread base gives way to a smooth lemon-cream layer and a silky strawberry topping, delighting your taste buds with every bite.
- Kid-Approved Flavor: The mild cream cheese and whipped topping combo is a gentle introduction for picky eaters, while the strawberry swirl adds a fun pop of color.
- Make-Ahead Convenience: Prepare these bars the night before a gathering; they keep beautifully and even taste better after sitting overnight.
- Customizable Sweetness: Control the sugar levels by adjusting the powdered sugar or strawberry preserves to suit your family’s preferences.
- With No-Bake Strawberry Dream Bars, you’ll impress guests with minimal effort and keep your cool.
Ingredients for No-Bake Strawberry Dream Bars
- 1 (8-ounce) container thawed frozen whipped topping, such as Cool Whip, divided
- Tip: Full-fat brands offer better stability; you can substitute homemade whipped cream if preferred.
- 8 ounces cream cheese, divided
- Tip: Soften at room temperature to avoid lumps in your layers.
- 4 tablespoons (1/2 stick) unsalted butter
- Tip: Melt on low heat or in 20-second bursts in the microwave to prevent browning.
- 8 ounces shortbread cookies, such as Lorna Doone or Pepperidge Farm Dublin Shortbread
- Tip: Alternative: graham crackers or vanilla wafers for a slightly different flavor.
- 1/2 teaspoon kosher salt, divided
- Tip: Balances sweetness—use fine sea salt if that’s what you have on hand.
- 1 medium lemon
- Tip: Zest before juicing to maximize citrus aroma in your cream layer.
- 1 cup powdered sugar
- Tip: Sift to remove lumps for a super-smooth filling.
- 1 (0.8- to 1.2-ounce) package freeze-dried strawberries
- Tip: Crush gently for a bright pink dust without large chunks.
- 1/2 cup strawberry preserves
- Tip: Use seedless for an ultra-smooth swirl; consider apricot preserves for a tangy twist.
How to Make No-Bake Strawberry Dream Bars
- Prep and Soften
- Thaw the whipped topping and let the cream cheese sit out for about 45 minutes. This ensures both components blend seamlessly without cold lumps. Line an 8×8-inch pan with overlapping parchment paper for easy removal later.
- Test Kitchen Tip: Overlapping sheets of parchment make lifting the entire block effortless—no crumbling corners!
- Create the Crust
- Break the shortbread cookies into chunks and process until you have fine crumbs (about 15–20 pulses). If you don’t have a processor, seal cookies in a sturdy plastic bag and crush with a rolling pin.
- Pour melted butter and ¼ teaspoon salt over the crumbs; pulse or stir until the mixture holds like wet sand. Firmly press into your prepared pan, using the bottom of a measuring cup to get smooth, even edges.
- Editor’s Note: A well-pressed crust provides a sturdy base to support the creamy layers above.
- Blend the Lemon Layer
- Clean your processor bowl, then add the cream cheese, powdered sugar, lemon zest, lemon juice (about 2 tablespoons), and remaining ¼ teaspoon salt. Process for 1 minute until silky and airy.
- Transfer half of this mixture to the butter bowl; gently fold in 1 cup of the whipped topping with a spatula until smooth. Spread evenly over the crust.
- Test Kitchen Tip: Use an offset spatula for perfectly flat layers—no bumps or valleys!
- Prepare the Strawberry Layer
- Crush freeze-dried strawberries in a bag until powdery. Reserve 2 tablespoons for garnish. In the processor, blend the remaining powder with preserves until smooth.
- Fold this strawberry mixture into the remaining cream cheese blend with ½ cup whipped topping. Spoon over the lemon layer and smooth gently with a spatula.
- Editor’s Note: For a marbled effect, swirl both layers lightly with a skewer.
- Top and Chill
- Dollop the remaining whipped topping over the strawberry layer; spread into an even final layer. Cover with plastic wrap and refrigerate until fully set—at least 4 hours, preferably overnight.
- Make-Ahead Reminder: These bars keep well for up to 4 days in the fridge, making them perfect for busy weekends.
- Slice and Serve
- Lift the chilled block using parchment overhang. Place on a cutting board and dust the top with reserved strawberry powder through a fine-mesh strainer.
- Clean your knife between cuts to achieve nine neat, Instagram-worthy bars. Enjoy immediately or keep chilled until serving.
Recipe Variations for No-Bake Strawberry Dream Bars
- Lemon-Lime Twist: Swap half the lemon juice for key lime juice and add lime zest for a zesty variation.
- Chocolate Drizzle: Melt 2 ounces of dark chocolate and drizzle over the top layer before chilling.
- Berry Mix-Up: Replace ½ cup of strawberry preserves with raspberry or blackberry preserves for a mixed-berry version.
- Gluten-Free Option: Use gluten-free shortbread or almond flour mixed with melted butter for the crust.
Serving No-Bake Strawberry Dream Bars
- On a Summer Platter: Arrange bars alongside fresh berries, mint sprigs, and edible flowers for a festive dessert board.
- With Ice-Cold Beverages: Pair with lemonade, iced tea, to complement the creamy-tart layers.
- Garnish Ideas: Top each bar with a fresh strawberry slice and a small mint leaf for a pop of color and freshness.
Storage & Leftover Tips for No-Bake Strawberry Dream Bars
- In the Fridge: Store in an airtight container for up to 4 days. Keep layers intact by adding parchment between stacked bars.
- Freezer-Friendly: Wrap individual bars in plastic wrap and foil; freeze for up to 1 month. Thaw overnight in the fridge before serving.
- Leftover Creations: Crumble bars over ice cream or yogurt for a fun strawberry-lemon parfait twist.
No-Bake Strawberry Dream Bars FAQ
How long do No-Bake Strawberry Dream Bars last in the fridge?
They stay fresh for up to 4 days when stored in an airtight container. After that, the crust may soften, and the whipped topping can lose its firmness.
Can I make these bars dairy-free?
Yes! Substitute dairy-free cream cheese, coconut whipped topping, and vegan butter for a fully plant-based dessert.
Conclusion & Call to Action
Whether you’re beating the heat or looking for an elegant make-ahead treat, these No-Bake Strawberry Dream Bars deliver all the flavor of a classic layered dessert with zero oven time. From the buttery shortbread base to the zesty lemon center and vibrant strawberry swirl, every bite is a little slice of summer bliss.
Ready to try them out? Let me know how your No-Bake Strawberry Dream Bars turn out, leave a star rating below, and share your photos on social media with #StrawberryDreamBars. Happy chilling—and happy baking without baking!

No-Bake Strawberry Dream Bars
Ingredients
Filling and Crust
- 1 container thawed frozen whipped topping such as Cool Whip, divided
- 8 oz cream cheese divided
- 4 tbsp unsalted butter 1/2 stick
- 8 oz shortbread cookies such as Lorna Doone or Pepperidge Farm Dublin Shortbread
- 1/2 tsp kosher salt divided
- 1 medium lemon
- 1 cup powdered sugar
- 1 package freeze-dried strawberries 0.8- to 1.2-ounce
- 1/2 cup strawberry preserves
Instructions
Preparation
- Begin by thawing the whipped topping if necessary. Let the cream cheese sit at room temperature to soften for about 45 minutes. Prepare an 8x8-inch baking pan by lining it with two sheets of parchment paper, overlapping them for easy lifting.
- Melt the butter in a large microwave-safe bowl for 40 to 60 seconds, or on the stove if preferred.
- Break the shortbread cookies into pieces and blend them in a food processor until you achieve fine crumbs, approximately 15 to 20 short pulses. If you don't have a processor, you can place the cookies in a bag and crush them with a rolling pin.
- Pour the melted butter over the cookie crumbs and sprinkle in 1/4 teaspoon of salt. Blend until the mixture resembles wet sand and sticks together when squeezed. If mixing by hand, combine the crumbs in a bowl with the butter and salt until the desired texture is achieved.
- Press the crumb mixture into the prepared pan evenly using a measuring cup or your fingers to reach all sides. Clean the food processor bowl and blade.
- Zest the lemon using a grater and extract the juice, yielding about 2 tablespoons. Place both the zest and juice in the cleaned food processor along with the cream cheese, powdered sugar, and the remaining 1/4 teaspoon of salt. Blend until smooth and airy, roughly 1 minute.
- Take half of this cream cheese mixture and place it in the reserved butter bowl. Mix in 1 cup of whipped topping with a spatula until fully blended and smooth. Spread this layer evenly over the crust.
- Crush the freeze-dried strawberries in a sealed bag using a rolling pin until they become a fine powder. Set aside 2 tablespoons of this powder in an airtight container for later use.
- In the food processor, add the remaining strawberry powder and the strawberry preserves to the leftover cream cheese mixture. Blend until perfectly smooth, about 30 seconds to 1 minute. Transfer this mixture to the butter bowl and incorporate 1/2 cup of whipped topping thoroughly. Spoon this strawberry layer over the lemon layer and smooth it out.
- Dollop the remaining whipped topping over the strawberry layer and spread it into an even layer. Cover the pan with plastic wrap and chill in the refrigerator until set, at least 4 hours or overnight.
- Using the parchment paper, lift the dessert out of the pan onto a cutting board. Dust the top with the reserved strawberry powder using a fine-mesh strainer. Cut into 9 bars, cleaning the knife after each slice for neat edges.