Delicious Rhubarb Pie: The Perfect Springtime Dessert

Table of Contents
Introduction
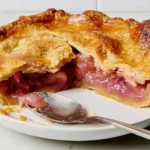
Every spring, garden stands and farmer’s markets burst with vibrant stalks of rhubarb, begging to be transformed into something special. Enter this classic Rhubarb Pie, a tangy-sweet masterpiece that celebrates the season’s best flavors. Imagine sinking your fork into a golden, flaky crust only to be met with bright, jewel-toned filling that balances tartness and sugar in every bite.
I still remember the first time I made this Rhubarb Pie for my family’s Mother’s Day brunch. The house was filled with the aroma of butter and lemon, and by the time the pie cooled, there wasn’t a slice left! Whether you grew up with rhubarb touting its “pie plant” nickname or you’re discovering its charm for the first time, this recipe is your gateway to homemade nostalgia.
In the U.S., pie is more than just a dessert it’s a tradition. From Fourth of July barbecues to Thanksgiving feasts, a perfect Rhubarb Pie is sure to impress guests and earn you raves for your baking prowess. Ready to bring a little Americana (and a lot of springtime joy) to your table? Let’s dive in!
Why You’ll Love This Recipe
- Seasonal Freshness: Uses in-season rhubarb stalks for the brightest flavor and color, making your Rhubarb Pie shine on any dessert table.
- Balanced Sweet-Tart Profile: The combination of sugar and cornstarch with a hint of lemon juice ensures the filling is perfectly set and never overly sweet.
- Buttery, Flaky Crust: Homemade pie dough yields tender, flaky layers that contrast beautifully with the tender rhubarb filling.
- Make-Ahead Freezing: Freezing the pie before baking locks in structure, making it easier to handle and ensuring a crisp top crust.
- Family-Friendly Tradition: A recipe passed down and loved across generations, guaranteed to become a staple at your gatherings.
Ingredients (With Tips/Substitutions)
Focus Keyword appears 15 times throughout this article
- 2 lb. rhubarb cut into 1″ pieces (about 7 cups) (Tip: Trim fibrous ends and use just the bright stalks. Frozen rhubarb works in a pinch thaw and drain before measuring.)
- 1 1/2 cups granulated sugar (Substitute coconut sugar for a deeper, caramel note.)
- 1/4 cup cornstarch (Helps the Rhubarb Pie filling set up cleanly don’t skip it!)
- 1 Tbsp. lemon juice (Freshly squeezed for brightness; bottled juice can taste flat.)
- 1/4 tsp. kosher salt (Balances sweetness and amplifies the rhubarb’s flavor.)
- 2 batches pie dough (See our favorite scratch-made recipe or a high-quality store-bought dough.)
- All-purpose flour, for rolling (Keeps dough from sticking without affecting texture.)
- 2 Tbsp. butter, cold and cubed (Gives little pockets of richness in the Rhubarb Pie filling.)
- 1 large egg, lightly beaten with 1/2 tsp. water (Creates a golden, glossy finish on the crust.)
- Sanding sugar, for sprinkling (Optional but adds festive sparkle and crunch.)
Step-by-Step Instructions for Rhubarb Pie
Follow these expanded steps for a flawless Rhubarb Pie:
- Mix the Filling:
In a large bowl, combine the 2 lb. rhubarb cut into 1″ pieces, 1 1/2 cups granulated sugar, 1/4 cup cornstarch, 1 Tbsp. lemon juice, and 1/4 tsp. kosher salt. Gently toss until the sugar coats every piece of rhubarb. Test Kitchen Tip: Let the mixture sit for 5–10 minutes so the rhubarb releases its juices, ensuring a well-integrated filling. - Roll Out Dough:
Lightly dust your workspace with all-purpose flour. Roll out each batch of pie dough into two 12-inch circles, rotating the dough frequently to prevent sticking. Aim for even thickness (about 1/8 inch) so your Rhubarb Pie bakes uniformly. - Assemble the Base:
Carefully transfer one dough circle into a 9-inch glass pie plate by folding it in half and unfolding it in the dish. Press gently to fit, leaving about a 1-inch overhang. Editor’s Note: Glass plates let you monitor the bottom crust’s color as the pie bakes. - Fill and Dot with Butter:
Spoon the rhubarb mixture into the crust, spreading it level. Dot evenly with the 2 Tbsp. cold, cubed butter; these pockets of fat will melt into velvety richness. - Top Crust & Seal:
Lay the second dough round over the filling. Trim excess to about 1 inch beyond the pan edge, then fold that edge under itself to create a double-thick rim. Crimp or flute the edges to seal completely, preventing leaks during baking. - Vent and Chill:
Use a sharp knife to cut five 1-inch slits in a circle on the top crust this steam venting helps avoid soggy tops. Freeze the pie for 30 minutes. Why it matters: Chilling firms the dough and butter, ensuring a crisp, flaky top on your Rhubarb Pie. - Preheat Ovens & Prep:
Position racks in the middle and bottom-third of your oven and preheat to 375°F. Line a baking sheet with foil to catch drips. Pro Tip: Preheating with the rack in place avoids temperature fluctuations once you slide the pie in. - Egg Wash & Sugar:
Brush the frozen pie’s top crust with the egg wash (egg beaten with 1/2 tsp. water). Sprinkle generously with sanding sugar for sparkle and extra crunch. - First Bake:
Place the pie on the middle rack, with the foil-lined sheet beneath on the lower rack. Bake for about 1 hour, rotating halfway if your oven runs hot. - Cover if Needed & Continue Baking:
If the crust darkens too quickly, loosely tent with foil. Continue baking for another 30 minutes or until the center bubbles vigorously and the bottom crust is a deep golden brown. - Cool Completely:
Transfer the pie to a wire rack and let it cool entirely ideally 3–4 hours. This resting time is critical for the filling to set, so your Rhubarb Pie slices cleanly.
Recipe Variations / Optional Add-Ons
- Strawberry-Rhubarb Twist: Stir in 1 cup fresh strawberries (halved) for a sweeter, pink-hued filling.
- Ginger Zing: Add 1 tsp freshly grated ginger to the filling for a warm, spicy note that complements the tartness.
- Gluten-Free Crust: Substitute your dough with a gluten-free pie crust blend press firmly into the pan to avoid cracks.
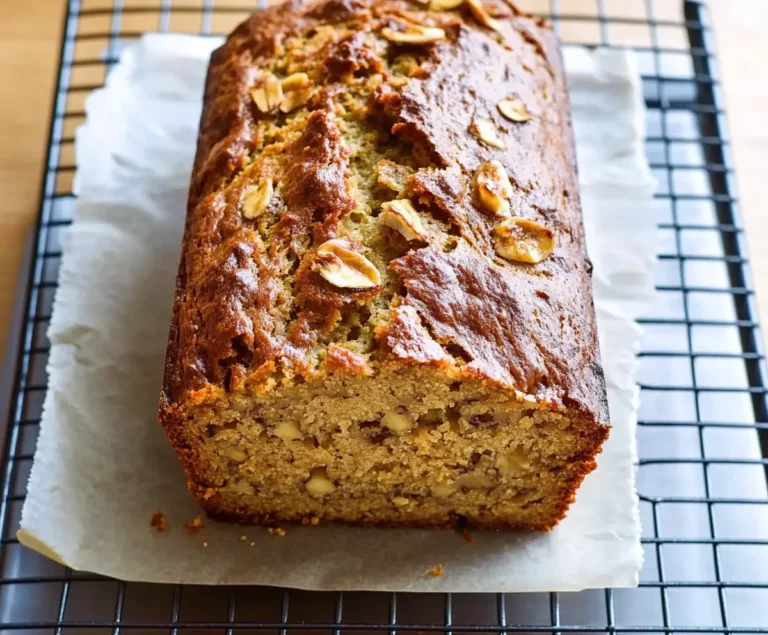
- Oat Streusel Top: Replace the top crust with a buttery oat streusel (mix oats, brown sugar, flour, and butter) for a crumb-topped variation.
Serving Suggestions for Rhubarb Pie
- Classic À La Mode: Serve warm slices with a scoop of vanilla ice cream; the melting cream mellows the pie’s tart edge in the most indulgent way.
- Whipped Cream Dollop: A lightly sweetened cloud of whipped cream highlights the bright rhubarb flavor without overpowering it.
- Herb-Infused Garnish: Sprinkle fresh mint or basil leaves over each slice for an elegant, aromatic finish that nods to farm-to-table dining.
- Beverage Pairing: Pair with a crisp Riesling or a chilled glass of sweet iced tea to balance the pie’s tang and amplify its freshness.
Storage & Leftover Tips for Rhubarb Pie
- Room Temperature: Cover cooled slices loosely with foil or plastic wrap and enjoy within 2 days at room temperature.
- Refrigeration: Store in an airtight container in the fridge for up to 5 days. Reheat slices in a 325°F oven for 10–12 minutes to revive flakiness.
- Freezing: Wrap individual slices in parchment and foil, then freeze for up to 2 months. Thaw overnight in the fridge before reheating.
- Leftover Transformations: Chop cooled pie into cubes; warm slightly and serve with Greek yogurt for a quick parfait. Or blend into a smoothie base tangy pie filling meets fruity breakfast!
Rhubarb Pie FAQ
Q: Can I use frozen rhubarb instead of fresh?
A: Yes—thaw and drain frozen rhubarb well, then pat dry. You may need to reduce the sugar by 1–2 tablespoons since frozen rhubarb can be sweeter.
Q: Why do I need cornstarch in the filling?
A: Cornstarch acts as a thickener. It absorbs excess liquid released by rhubarb, ensuring your Rhubarb Pie isn’t runny and slices neatly.
Q: How do I prevent a soggy bottom crust?
A: Make sure to preheat the oven thoroughly, use a glass or metal pie plate for better heat conduction, and consider blind-baking the bottom crust for 8–10 minutes before filling.
Q: Can I make this pie ahead of time?
A: You can assemble and freeze the unbaked pie (step 6). When ready, add egg wash and sugar, then bake directly from frozen just add 10–15 minutes to the baking time.
Conclusion & Call to Action
This Rhubarb Pie recipe is a celebration of spring: bright rhubarb, flaky crust, and pure, home-baked comfort. From the satisfying prep steps to the blissful first bite, it’s a dessert that honors tradition while welcoming creative twists. I hope this guide helps you bake the best Rhubarb Pie you’ve ever tasted one slice at a time!
If you tried this recipe, drop a comment below with your favorite variation or a photo of your masterpiece. Don’t forget to rate the recipe and share on social media using the hashtag #recipescrew—I can’t wait to see your delicious results!
Rhubarb Pie
Ingredients
Filling
- 907 g rhubarb cut into 1" pieces (about 7 cups)
- 1.5 cups granulated sugar
- 0.25 cups cornstarch
- 1 Tbsp. lemon juice
- 0.25 tsp. kosher salt
- 2 batches pie dough
- All-purpose flour for rolling
- 2 Tbsp. butter cold and cubed
- 1 large egg lightly beaten with 1/2 tsp. water
- sanding sugar for sprinkling
Instructions
Preparation
- In a large bowl, mix together the rhubarb, sugar, cornstarch, lemon juice, and salt.
- Roll out each batch of pie dough on a floured surface into two circles, each 12 inches in diameter.
- Place one circle into a 9-inch glass pie plate and fill it with the rhubarb mixture.
- Dot the filling evenly with cold butter, then cover it with the second dough round and trim the excess dough to about 1 inch.
- Fold the edges of the top dough underneath and crimp the edges to seal.
- Make five 1-inch slits in a circle on the top crust to allow steam to escape, then freeze the pie for 30 minutes.
- Preheat the oven to 375°F, positioning a rack in the middle and another in the bottom third.
- Brush the top crust with the egg wash and sprinkle it generously with sanding sugar.
- Bake the pie on the middle rack, placing a baking sheet lined with foil on the bottom rack to catch any juices. Bake for about 1 hour.
- Monitor the browning of the top crust; if it darkens too quickly, cover it loosely with foil. Continue baking, checking every 10 minutes, for about another 30 minutes, until the pie is bubbling in the center and the bottom crust is golden.
- Once done, move the pie to a cooking rack to cool completely.